How to create a portable Windows 11/10 USB Drive
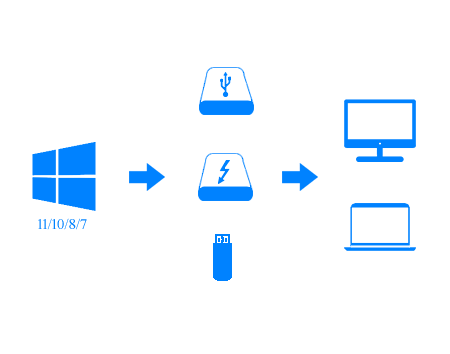
Portable Windows 11/10 refers to installing a fully-functional Windows 11/10 to a USB drive, and then being able to start Windows 11/10 on the USB drive on any computer. If you know Windows To Go (WTG), then you will find that Windows To Go is what we usually call portable Windows. The main feature of Windows To Go is to allow Windows to roam on different computers, so we can carry our Windows working environment in our pockets and use it in different places, such as home, company or school.
Choose the best tool for creating portable Windows 11/10.
Hasleo WinToUSB is the world’s first third-party software that can be used to create portable Windows. In recent years, other tools that can be used to create portable Windows have appeared on the market, such as Refus, Aomei and EaseUS. However, WinToUSB is still the most powerful portable Windows creation tool, it supports the creation of portable Windows from ISO, WIM files and CDROM, cloning of currently running Windows to USB drives as portable Windows, creating a BitLocker encrypted Windows To Go, and even creating portable Windows from the Windows system backup image files produced by Hasleo Backup Suite.
As the best portable Windows creation software, WinToUSB allows you to install any version of Windows 11/10 onto a Certified or Non-Certified Windows To Go USB drive as portable Windows 11/10. After you’ve created a portable Windows 11/10 USB drive, you can install applications and copy files to the portable Windows 11/10 USB drive. Now you get a fully functional Windows 11/10 system which can boot from the USB drive, then you can carry it to anywhere and use it on any computer.
Step by step tutorial to create a portable Windows 11/10 USB drive with Hasleo WinToUSB.
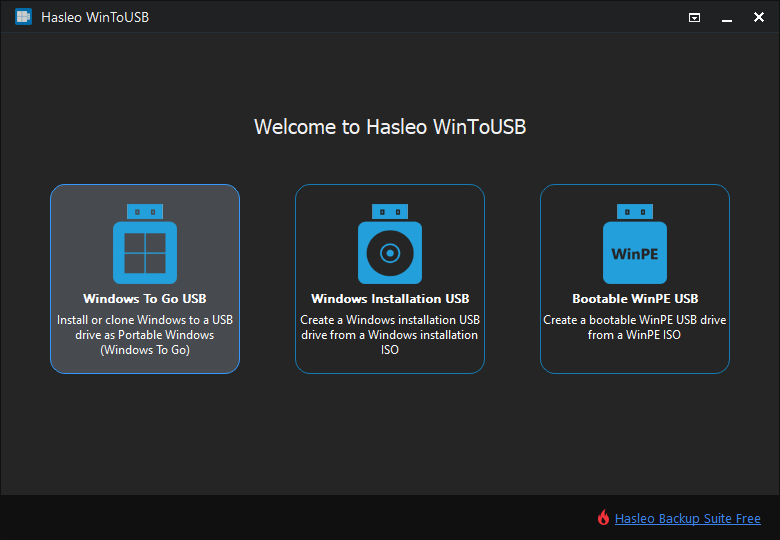
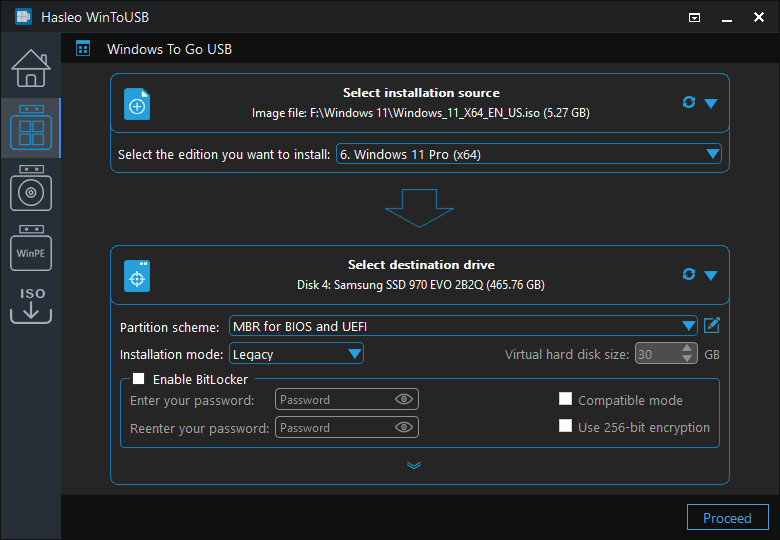
Step 1. Connect the USB drive to the computer, download, install and run Hasleo WinToUSB and then click “Windows To Go USB”.
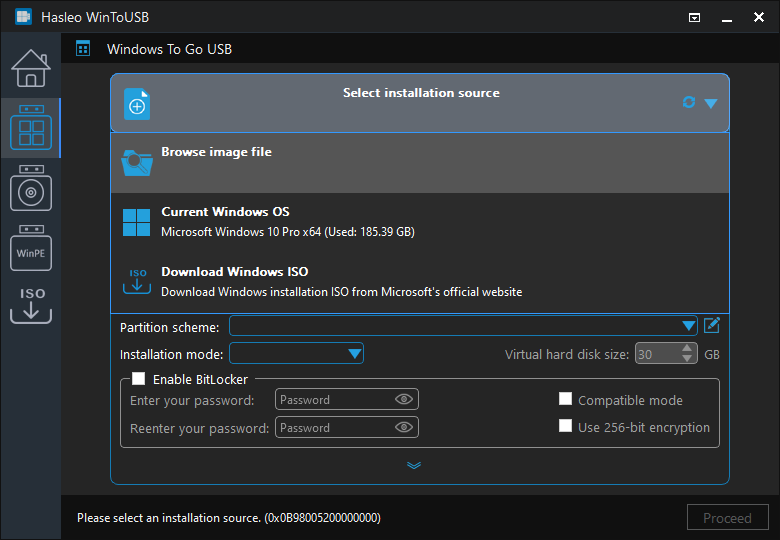
Step 3. Hasleo WinToUSB scans for and lists installable operating systems, select the edition of Windows you want to install.
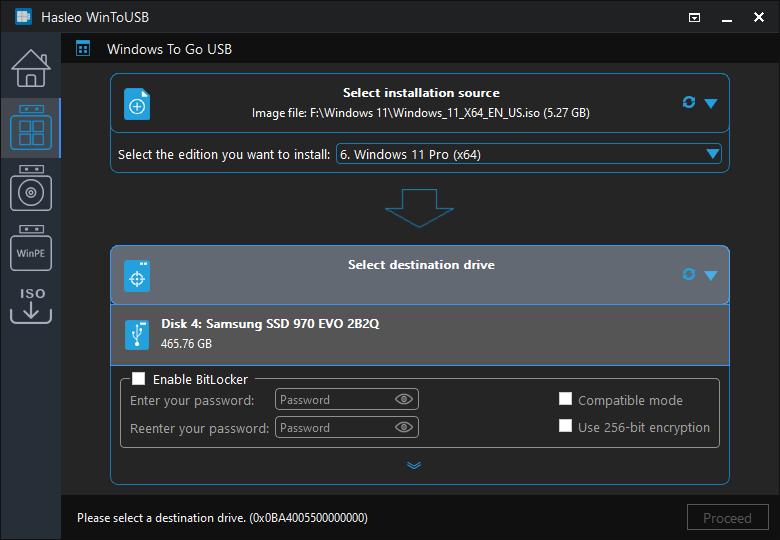
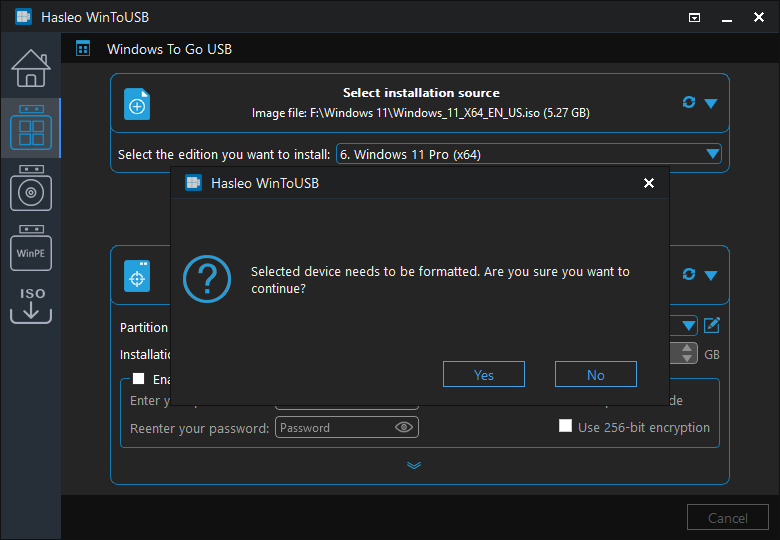
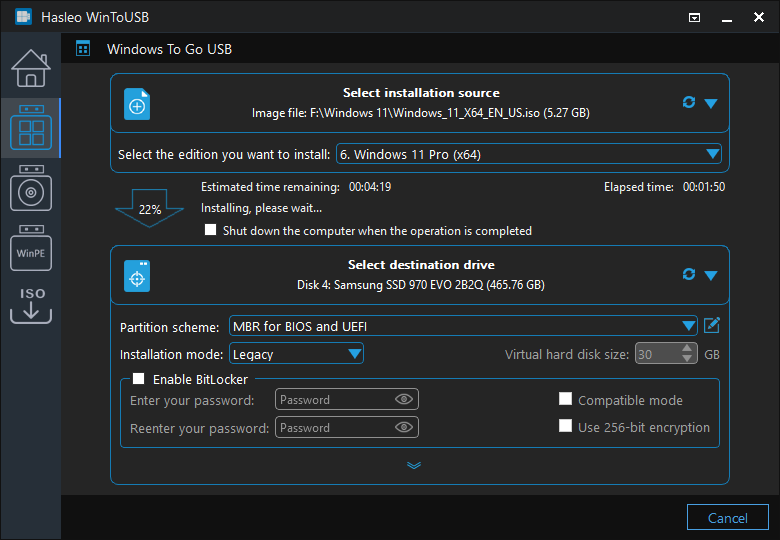
Step 6. After clicking “Proceed”, a pop-up will appear asking you if you want to format it to continue, click “Yes” if you are sure.
Boot and run Windows 11/10 from the portable Windows 11/10 USB drive.
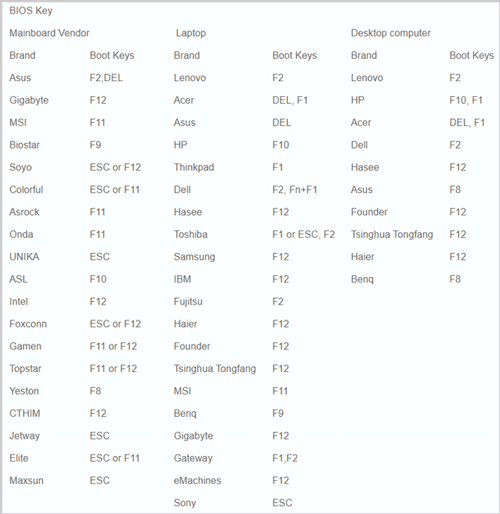
BIOS settings allow you to run a boot sequence from a floppy drive, a hard drive, a CD-ROM drive or an external device. To boot portable Windows from a USB drive, you need to enter the BIOS and change the boot sequence to set the USB drive as the first boot priority.
Step 1. After the installation is complete, restart the computer, press the appropriate key to boot into BIOS. Different motherboards and computer manufacturers use different keys to enter the BIOS. Usually, when the computer starts, you will be prompted to enter the key to enter BIOS, but the prompts are usually displayed for a short time and you may not be able to see it clearly. Below we list the keys used by popular brands of motherboards and computers to get into BIOS.